Please note that I may earn a small commission from purchases made through product links in this article. As an Amazon Associate I earn from qualifying purchases.
Last updated: March 8, 2023
Learning how to use a safety razor can seem a bit scary at first.
Even if you shave regularly, you will need to learn some new techniques to use a safety razor properly.
But once you do, you will immediately notice a better quality shave that keeps your skin smooth for days.
Here are our top tips on how to use a safety razor.
How to Use a Safety Razor: Our Top Tips
- Invest in A Starter Pack of Mixed Trial Razor Blades
- Find Out How to Safely Replace the Blades in Your Safety Razor
- Learn How to Safely Remove the Blade From its Packaging
- Take Short and Light Strokes When Shaving
- Cut Across the Grain for Stubborn Hairs or Tricky Spots
- Don’t Press Too Hard
- Always Rinse and Clean Your Safety Razor
Tip 1. Invest in A Starter Pack of Mixed-trial Razor Blades
One of the best things you can do when you first start using a safety razor, is trying out some blades.
You can easily find trial packs like this one below that offer you samples of blades from various brands.
No products found.
You should do this to test out which blades will work best for you. Each brand usually offers 5 of the same blade type in a pack.
This is plenty for you to test, as of course you can use each blade more than once.
Once you have a specific brand or blade that you like, you can start to purchase them in bulk.
Tip 2. Find Out How to Safely Replace the Blades in Your Safety Razor
This step always seems a bit scary at first, because you probably never had to handle razor blades with a disposable razor.
But once you’ve done it once or twice, you will quickly realize it is very easy.
Just remember when you pick up a razor blade, pick it up from the two short ends (not the long ends, these are the sharp ends!).
Safety razor brands also make it very easy for their users to learn how to open and close their razor, and always have instructions in the box.
There are three types of opening mechanism that are common for most safety razors:
- Three Piece
- Two Piece
- Butterfly
Three Piece:
A three piece mechanism means that the safety razor can be pulled apart into three pieces – the handle, the bottom plate and the top plate.
The two plates are what keep the blade in place (it is sandwiched between the two).
No products found.
To pull apart a three piece safety razor, normally all you have to do is unscrew the handle from the plates and it will come apart in three pieces plus the razor.
Two Piece:
A two piece razor is when the handle and bottom plate are permanently fixed together.
The razor can be pulled apart by unscrewing the top plate and removing the blade.
No products found.
Butterfly:
A butterfly safety razor is totally different.
Instead of the razor breaking apart into individual pieces, the top section of the head mechanically opens like a pair of wings, revealing the blade inside.
No products found.
This allows you to pull out the blade and replace it. There is normally a little knob at the bottom of the handle that opens and closes the wings.
Once you know how to open and close the razor, the next step is to put in a new blade.
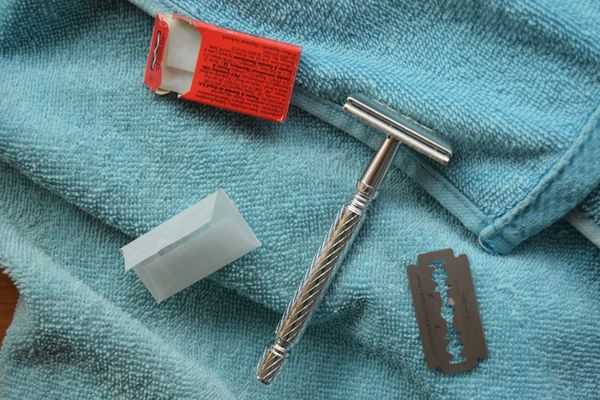
Tip 3. Learn How to Safely Remove the Blade From its Packaging
When you need to pull out a new razor blade, they usually come individually wrapped in paper, and in a little plastic box to help you only pick out one at a time without cutting yourself.
Once you have taken the blade out of the box, unwrap it from its paper, and then pick it up from the two short ends with your index finger and your thumb.
This is very important – always when you pick up a razor blade, pick it up from the two short ends (not the long ends, as these are the sharp ends!).
Once you have picked up the blade, position the centre hole on the blade with the centre post on your safety razor.
From this step follow the instructions that came in the box to close the razor or put it back to together.
Now you are ready to start shaving!
Tip 4. Take Short and Light Strokes When Shaving
If you are used to using disposable razors, you will notice that a safety razor is a bit heavier than a plastic one.
Safety razors also don’t have flexible heads like disposable razors.
This means the way that you shave will need to adapt to suit the razor. It sounds like a pain, but actually it means a better result for your shave.
It also means you won’t need to shave as often.
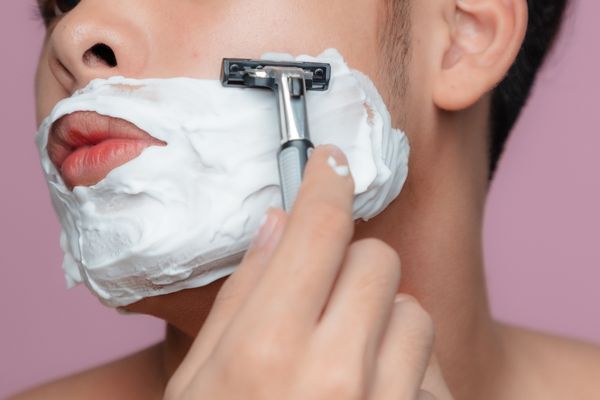
The heavier head of the safety razor means it sits closer to the skin without the need for you to push down hard to cut the hair.
As a result you will naturally get a closer shave.
Making shorter and lighter strokes will help you shaving in tricky areas if you are used to a flexible head razor.
It will give you alot more control and accuracy without accidentally cutting your skin.
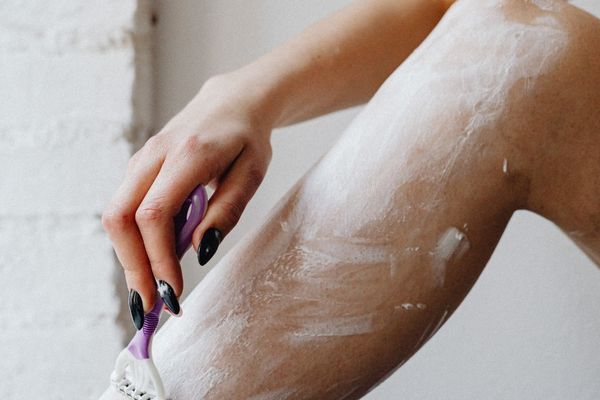
Tip 5. Cut Across the Grain for Stubborn Hairs or Tricky Spots
Another useful tip on how to use a safety razor is to adjust the angle that you normally use to shave.
For example, when shaving your legs, shaving around your shins and your ankles are always tricky.
This is because as the skin is thinner in these than other parts of your leg.
Also it’s harder to see that you are holding the razor at the right angle to your skin.
As I mentioned in the previous tip, the head of your safety razor doesn’t flex like a normal disposable razor either.
Because of this, if you shave your leg in your usual way, you may find you get more nicks and cuts, either because you are holding the razor at the wrong angle, or pressing too hard.
One trick I have learnt to get around this is to shave across the grain.
So for example if you are shaving over your shinbone, instead of shaving up or down your leg, hold the razor perpendicular to your leg.
Then shave away from your shinbone, either to the left or the right.
No products found.
You might need to shave over the same spot a few times to get any thicker hairs, but it will be easier for you to see how you are holding the razor and control your strokes.
And because you are shaving over an area where the skin is thicker you can press slightly harder (but not too hard!) for thicker hairs.
The same logic applies to other tricky spots like your underarms or your bikini area.
Remember you are not trying to win an award for world’s fastest or closest shave! This technique will still help give you a smooth long-lasting result.
Tip 6. Don’t Press Too Hard
Remember what I said earlier about taking short and light strokes? I want to emphasize that again with this point here.
Disposable razors with flexible heads are designed to stick close to your skin and shave in long hard strokes to cut as close as possible.
Because the razor itself is light and flexible, you do need to press down to get the blade as close as possible to the hair.
But a safety razor already has a heavier head, as soon as you put it on your skin you can feel the difference.
You shouldn’t need to press as hard as a disposable razor to cut through stubborn hairs.
If you are, there could be a couple of reasons for this.
The most obvious one is that you need to replace your razor blade because it has become too blunt to use.
The other is that you need to try shaving at a different angle.
It’s time to try my tip 4 about shaving across the grain or adjusting your shaving angle another way to make the cut.
Tip 7. Always Rinse and Clean Your Safety Razor
This was one of the biggest differences I noticed when I switched from a disposable razor to a safety razor.
Cleaning and maintaining your safety razor is super important for its longevity.
There is no point switching to a safety razor if you need to throw it out a month later because it’s covered in rust and bacteria.
A safety razor that is well-looked after could last you for years. Think about how many disposable razors you would normally go through in that time!
So how do you keep your safety razor clean? It’s actually pretty simple.
How to Clean Your Safety Razor
Every time after you use the razor, do two rinses under the tap in hot water.
The first rinse you can do while the razor is still assembled. This is to remove any access hair or shaving cream.
Afterward pull the safety razor apart. Then wash and rinse each part individually quickly and dry immediately.
To wash and clean your razor, you can use normal hand soap just to kill any nasty bacteria.
It’s important to dry all the parts immediately afterward as well, to avoid any bacteria, mold growth or rust.
If your razor is a bit blunt then also use this opportunity to replace it with a new one.
Pretty easy right? It’s not that different from looking after a regular disposable razor.
The advantage too is that because safety razors are so easy to take apart, you can give them a more thorough cleaning than a disposable razor.
Another important step is to make sure that you store your razor somewhere so it stays clean and dry (so don’t leave it wet in the shower!).
Bacteria and mould loves to grow in wet damp areas, so keeping your razor clean and dry is important so that you don’t get a nasty infection.
A neat razor stand like this one below, will help keep your razor clean by keeping it off your sink counter.
No products found.
Final Thoughts
Now you know the basic steps for shaving with a safety razor.
So slow down and enjoy the soothing ritual of shaving.
If you haven’t found a suitable safety razor for you yet, you can take a look at our recommendations for the best safety razors with stands, and the best safety razors for women.